01 Units of Sound

Introduction

Hero

Overview

welcome screen 1

  • Units of Sound is a structured, cumulative literacy intervention program which starts with all 26 letters of the alphabet. At the beginning, it concentrates on vowels and consonant vowel consonant (cvc) words: for example, mat or dog.
  • The program was originally developed for audio-cassette and book format by Walter Bramley, but has since been developed and extensively revised by Dyslexia Action, and, subsequently, Nisai Group.
  • Much of the work is conducted independently by the students with tutors taking a monitoring role.
  • We continue to use the book metaphor to describe Units of Sounds: three books, or Stages:
  1. Stage 1 (52 pages) – from cvc words
  2. Stage 2 (48 pages) – from blends and digraphs
  3. Stage 3 (48 pages) – multisyllable words

Content

  • Units of Sound teaches reading (emphasis on decoding), spelling and writing skills.
  • There are separate placement tests for reading and spelling, as many students do not have the same skills levels in these areas.
  • Students are placed where they are working comfortably, not where they are struggling.
  • No spelling rules are taught overtly. Instead, Units of Sound focusses on teaching auditory and visual patterns, rather than individual words.
  • The only exceptions are irregular words, which are dripped into the program when they are needed, or are similar to the patterns on the page.
  • Revisiting is a guiding principle of Units of Sound so that students learn in the most natural way.
  • Each unit of sound occurs in all four programs, so the student meets the words and sounds in different settings.
  • By the time any word appears in Dictation, the student should feel confident in reading, spelling and writing it.

0 people did not find this helpful

Back To Top

Who is Units of Sound for?

  • Units of Sound is for anyone who needs help with decoding, spelling and writing.
  • It is used widely with students from around 8 years to adult.
  • Care should be taken with students under 8 years old to ensure they need a second chance program, rather than more of the initial teaching of reading.
  • Units of Sound can be beneficial for students with English as a second language because of its multisensory, overlearning  nature,  and the pronunciation recording feature in Reading.
  • The structure of Units of Sound and lack of analysis makes it a valuable tool for students with a wide range of abilities and literacy difficulties.

0 people did not find this helpful

Back To Top

What do I cover in a week?

  • The time a student spends on Units of Sound in a session will depend on: how much time is available, the student’s age and ability and the level of need.
  • A common pattern is for students to cover 2 new pages of both Reading and Spelling each week, although it is possible to have a more intensive intervention, especially for older students.
  • Use what time is available: regular sessions are important.
  • Independent work can be carried out at home or out of curriculum time in addition to time with a tutor.
  • There are many models, depending on time and circumstances: e.g from three or four sessions of 20-30 minutes a week, to two sessions of 45 minutes a week, to Units of Sound being used as part of specialist lessons of an hour and a half.
  • There is no right or wrong model.
  •  AutoRoute determines the order in which the student follows the program.

0 people did not find this helpful

Back To Top

What does the tutor do?


  • The tutor’s role is vital in the smooth running of the lesson and establishing a positive learning environment.
  • The tutor carries out Setup and Placement.
  • The tutor conducts the Reading Check, which informs the pace of the route through the Reading program.
  • The tutor’s aim is to guide the student through the program  without the student experiencing failure or frustration.
  • Units of Sound does not involve micro-planning for each lesson, therefore the tutor has more time to provide additional, individualized work for those students with more profound needs.

0 people did not find this helpful

Back To Top

Student Ratio


  • A 1:1 tutor-student ratio is rarely necessary and is not recommended for mainstream students as much of the work is independent work on the computer.
  • Units of Sound is designed so the student works and learns independently, but with support in a secure framework.
  • Independent work develops active learning in students.
  • Support for students includes the Screen Tutors, which demonstrate each new activity.
  • One of the benefits of independent work is that students develop confidence in their own ability to learn and not become tutor dependent.
  • The tutor-student ratio will vary according to the severity of the student’s learning needs, behavioural considerations and staff availability.
  • Small group work can generate a positive learning environment, which allows 1:1 work  for short periods as needed.
  • Group work with team teaching is probably the ideal situation with 2:6 or 2:10 ratios.
  • Tutors will soon learn which is the best model for their environment.
  • It is better to start with a small group and expand once tutors are confident with using Units of Sound.

0 people did not find this helpful

Back To Top

Lesson Planning


Introductory Lessons

  • Students in their first Units of Sound lesson will not know what to expect, or what to do.
  • The Reading and Spelling Placement is carried out first to place the student at the right level. This is best carried out with one or two students at a time. Remember, you can add students to the register in advance.
  • Once Placement is complete you may wish to get the student to read the passage in the Reading Check set that is prior to the Reading Check set due.
  • The Reading Placement allows you to see the student’s single word decoding skills, and the Reading Check passage gives you an idea of their fluency – you can decide to set them back if necessary.
  • You can now explain the Welcome screen to the student and show them Overview. This gives the student a sense of their starting point and goals.
  • If you are starting with a group, you may like to begin by showing the screen tutor for Reading Blocks, which covers a lot of the basics.
  • Alternatively, you can demonstrate the actions yourself.
  • It’s easier to keep AutoRoute off in the first few sessions so the student can work on the skill that you have demonstrated. Once all skills have been covered, we recommend switching AutoRoute on.

Practice

  • Placement sets the individual’s program and automatically keeps a record of the pages completed. See Student Management / Setup: Placement for full details.
  • If you select AutoRoute, the sequence of skills the student will work through will be pre-set, freeing the teacher from monitoring this aspect of the work.
  • In this way the student or tutor does not have to worry about which skill to go on to as the program will automatically highlight the next skills area.
  • The page number to be worked on can be overridden at any time by the tutor by setting the page in Student Management.
  • ‘Jump to’ can be used to go to a page the tutor wants the student to cover again, if, for example, Reading Check highlights difficulty with a particular sound.
  • In this way control remains in the hands of the tutor.
  • A full Units of Sound lesson may well include a Reading Check,(section 05), Writing Exercises, (section 09), or other support activities.

0 people did not find this helpful

Back To Top

02 Technical Guide

Sound Check

Students should always use a headset with a microphone when working with Units of Sound.

Setting the correct levels for sound is important to help the student get the best from their lessons.

Units of Sound uses the default sound device on the computer, microphone settings and record levels should be checked before accessing Units of Sound

This video will help you check your microphone before using Units of Sound.

Click to view

0 people did not find this helpful

Back To Top

Network Settings

Units of Sound is an on-line service, network delays can cause problems for students accessing and saving their lessons, the appearance of freezing in a lesson and sound issues.

Your technician or IT support must set the school firewall / netfilter to trust https://online.unitsofosund.com by allowing mp3 files and switch off https / ssl inspection for Units of Sound.

Please inform your IT department / school technician of this requirement, if they have any questions they can contact Units of Sound support.

0 people did not find this helpful

Back To Top

Submit a help request

If you are really stuck and haven’t found the answer to your technical issue, you can send a message to the Units of Sound team via the messaging icon at the bottom right of the screen when logged in as tutor. Alternatively use the contact form on the main website. http://www.unitsofsound.com/contact-us


0 people did not find this helpful

Back To Top

03 Student Management

Introduction

Student Management Icons

Click for Screen Tutor

Student Management is the administrative centre for Units of Sound. It is where setup details, placement, records and reports are accessed. It covers the setting options available to adjust the program to suit the needs of the individual. A good working knowledge of Student Management is vital if a tutor is going to facilitate the Units of Sound program to its full potential.

0 people did not find this helpful

Back To Top

Setup: Details

  setup

Overview

This is where new students and tutors are added to Student Management and login details set up. There are also some options to set for students. This is also where you can change those details and options at a later date, and delete a student or tutor.
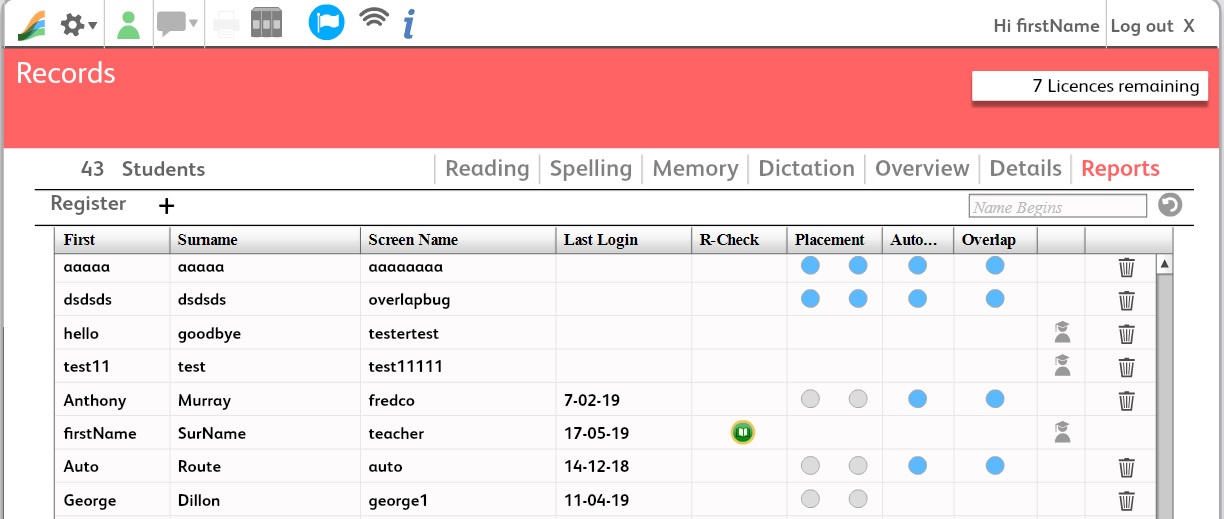
 

Logins

  • You will have been sent your tutor login when you started your licence – a tutor login gives access to the student program as well as to Student Management.
  • It gives you the facility to set up other tutors and students.
  • It is a good idea for tutors to have their own unique login so that the Units of Sound team can see who messages are from.
  • Tutors do not count towards the student number licence so there is no need to ration them.


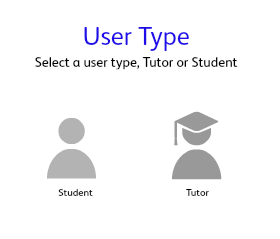
Setting up a New Tutor

Click for Screen Tutor
  • Login using tutor access.
  • Click on the Tutor area.
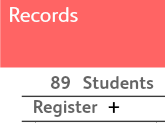
  • Click the + sign in the Register.

plus sign


  • Select tutor.
  • Fill in the details for the new tutor.
  • Save.
  • Both UofS ID and Password require a minimum of 8 characters. You will not be able to save with a lower number.


Setting up a New Student

Click for Screen Tutor
  • From the Register click the + icon.

plus sign

  • Select student.
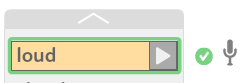
  • Fill in the data boxes with the student’s name.
  • UofS ID and Passwords need a minimum of 4 characters each.
  • How you allocate passwords and student identification is up to you. Many schools already have systems in place for this and so the same logins and passwords could be used for Units of Sound.
  • Email is an optional field as primary age children may not have email addresses. This is only used to reset a password if someone forgets it.
  • If there isn’t an email address provided, the student will be advised to contact the tutor for a password reminder.
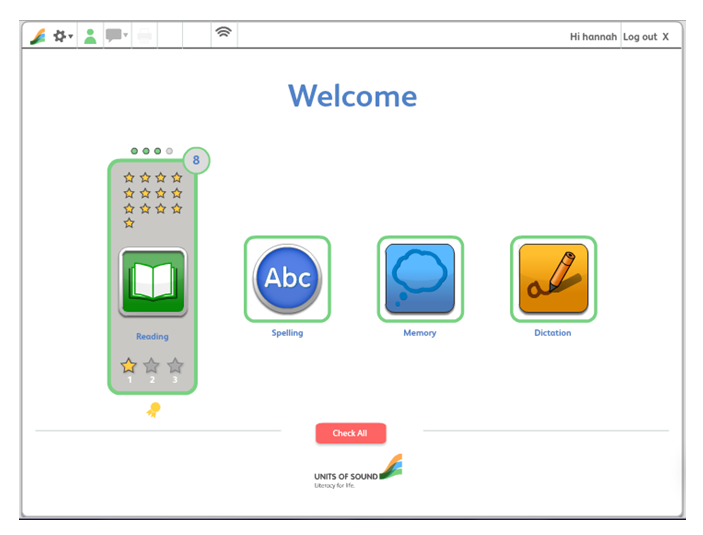
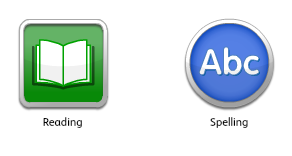
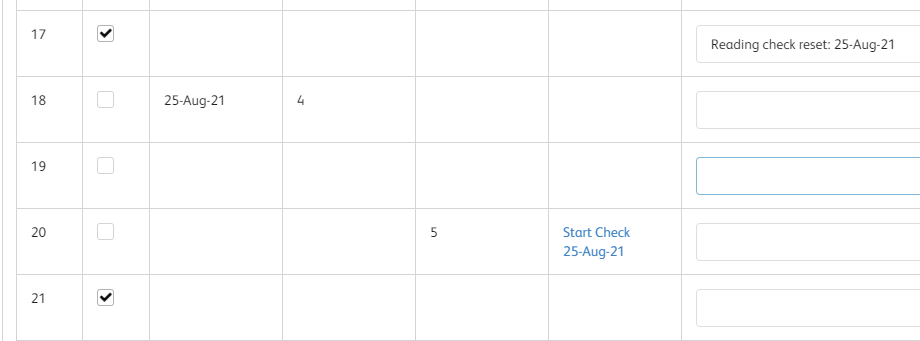
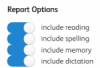
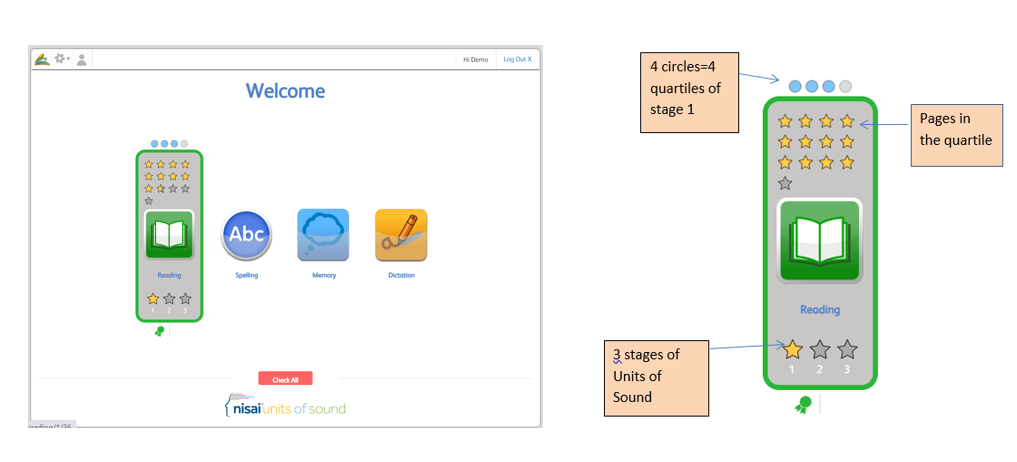
  • Set up Options include: Reading Overlap, AutoRoute and Placement reset.


Options: Overview

Options settings adjust the way Units of Sound is presented to the students. These settings can be re-set at any time, so don’t worry if you aren’t too sure what you want to begin with. Once you are familiar with Units of Sound, you will find this very easy to do. There is a comprehensive document Options Explored giving you a wider discussion on the areas to consider when making a choice. This document can be found in the Library, and from the Library section of Help.
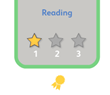
Reading Overlap

Students using Units of Sound have a range of strengths and weaknesses and we have found some who benefit from working through the Reading Program at a slower pace, so that an additional layer of repetition is built in. This means that instead of covering each page once, they do it twice. In this option the pages are staggered rather than consecutive, so that a student doesn’t cover the same page twice on the same day.

Reading Overlap is recommended for students with a significant deficit in reading, or those you judge to be in need of a gentle introduction to Units of Sound. Students on Stage One who are more than 10 years old would normally be set on overlap for instance.

The default setting for Reading Overlap is OFF.
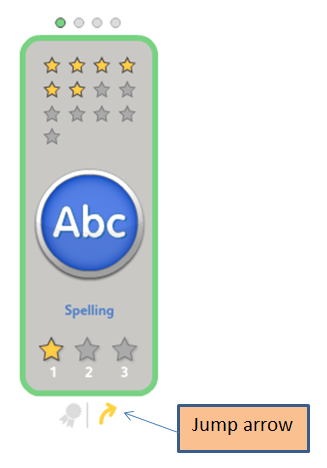
AutoRoute

Use AutoRoute if you want to set the sequence of skills for the student to follow. This will keep Reading, Spelling, Memory and Dictation in balance and free the tutor from having to monitor this aspect of the work. This is particularly useful when students are working in large groups, or are working independently, such as at home.

  • It lets the tutor concentrate on student support, and not worry about students working too much in one skills area and neglecting another.
  • Not setting AutoRoute means that students can access the skills areas in any order.
  • The sequence will take into account the Overlap setting and will modify as the student works through the program.
  • For full details of the settings, see the Options Explored document in the Library.
  • The default setting for AutoRoute is ON.


0 people did not find this helpful

Back To Top

Setup: Placement

  • The default setting for Reading and Spelling Placement is ON since all students need to be placed at the correct level. When the students logs on the Placement Exercises are presented before the student has access to any other part of the program.
  • If the Placement Exercises are not selected, the student program will be set from the beginning of Stage One for all four skills areas.

0 people did not find this helpful

Back To Top

Placement Exercises

Overview

Click for Screen Tutor

placement

  • The tutor carries out Reading and Spelling Placement with the student in order for the program to be set at the right level for the student’s skills.
  • Students will be placed where they are comfortable, not where they are struggling, in this way the student can feel confident right from the outset.
  • It is easiest to screen one student at a time, and both Reading and Spelling Placement can be done in the same session.
  • However, it is possible to screen two students at the same time if necessary – one student can do the Spelling Placement independently, whilst the other does the Reading Placement with the tutor.
  • Reading and Spelling have separate placement exercises because they are two different skills – the student needs to be placed at the right level for each.
  • Students should always be supervised for Placement, this is not practice work.


Reading Placement

Click for Screen Tutor
  • Once Placement has been set in Options, it will open automatically when the student logs on.
  • Ask the student to focus on the middle of the screen, while the tutor controls the mouse.
  • Explain that you will need to show some words the student will find too hard in order to find the correct starting point.
  1. Click for the first word, which will appear in the middle of the screen.
  2. The student has 2 seconds to read the word aloud.
  3. If it is correct, click on the tick.
  4. It it is wrong, click the cross.
  • You are looking for automatic decoding.
  • If there is a long pause or the student is sounding out the word, mark it wrong.
  • If you don’t do this, the student will be working at a level that is too difficult, rather than comfortable.
  • Don’t give any feedback other than encouragement – treat it like a test.
  • The words presented will adjust according to the responses.
  • Placement stops automatically when the Reading program has been set for the student – save the results.
  • Times vary according to the students’ levels, but you should allow 10 minutes for this exercise.

Spelling Placement

Click for Screen Tutor
  • The student should wear a headset for Spelling Placement to ensure good quality sound.
  • The student clicks on the arrow to hear the word and then types it in.
  • Encourage the student to check what he/she has typed before clicking for the next word.
  • The student can hear a word as many times as necessary using the replay arrow:
    listen again arrow
  • Placement stops automatically when the Spelling program has been set for the student – save the results.
  • The tutor should decide whether or not a student can be left to complete the spelling placement independently, but the exercise should always be supervised.

0 people did not find this helpful

Back To Top

Records: Introduction

StudentManagement_300x140

Records for tutors are found in the Student Management area, accessed via the Tutor icon.

0 people did not find this helpful

Back To Top

Records: Register

 register


Click for Screen Tutor


Finding your way around

  • The Register is where all a tutor’s students’ names and details are listed.
  • Highlight the student name whose records you want to look at.
  • Click on the record label (Reading, Spelling, Memory, Dictation, Overview, Details, Reports) to access the record you want.

0 people did not find this helpful

Back To Top

Records: Reading

columns

 records


Click here for Screen Tutor

Overview

The Reading Record shows:

  • Pages not set for the student – unticked with no date or time
  • Pages set for the student – ticked
  • Page number accessed, date and time taken (if Overlap is set on – there will be 2 tick boxes)
  • Reading Check set
  • Memo area for tutor notes.

Reading Check Record

  • The Reading Check date will be set automatically when the tutor completes the check
  • The set column guides the tutor when the next Reading Check set is due – this corresponds to the set number on the rosette screen of the student’s reading page
  • Any pages reset from the Reading Check results page will be automatically reset on the program.
    NB: The Overlap option is for students who are likely to need more repetition. The Good Practice Checklists help you make sure the students get the most out of Units of Sound. Making use of these reduce the need to reset pages.

Memo
The Memo area is a free text space for you to record anything you like regarding the student’s work in the reading program.

0 people did not find this helpful

Back To Top

Records: Spelling

Spelling


Click here for Screen Tutor

Overview

Spelling Records show:

  • Pages not set
  • Pages the student has worked on
  • Pages set for future work
  • Date and time a page was completed
  • Score obtained in Check Spelling
  • Access to student work in Check Spelling
  • Memo area for tutor notes.


0 people did not find this helpful

Back To Top

Records: Memory

Memory


Click for Screen Tutor

 Overview

Memory Records show:

  • Pages not set
  • Pages the student has worked on
  • Pages set for future work
  • Date and time a page was completed
  • Score obtained in Memory Phrases
  • Access to student work in Memory Phrases
  • Memo area for tutor notes.

0 people did not find this helpful

Back To Top

Records: Dictation

Dictation


Click for Screen Tutor

Overview

Dictation Records show:

  • Pages not set
  • Pages the student has worked on
  • Pages set for future work
  • Date and time a page was completed
  • Score obtained in Dictation exercise
  • Access to student work in Dictation
  • Memo area for tutor notes.

0 people did not find this helpful

Back To Top

Records: Overview

overview
Click for Screen Tutor


Introduction

  • This is the ‘at a glance’ view of a student’s work completed so far in all four skills areas.
  • To access: highlight the student’s name in the Register and click on Overview in the menu tab.

The following document is a guide to the Overview and useful to give to parents/guardians of students:

Overview Guide


Table

  • Date  of Placement Exercises
  • Starting page numbers for the  four skills areas
  • Number of sessions the student has worked on each skill area
  • Number of Reading Check activities completed
  • Average score for Check Spelling, Memory Phrases and Dictation
  • Average time taken on the scored activities
  • Number of pages completed so far
  • Number of pages repeated on the scored activities.


Overview Chart

chart

The chart shows:

  • The pages of Units of Sound the student has completed
  • The pages of Units of Sound the student has been set
  • The pages of Units of Sound the student does not have to complete

0 people did not find this helpful

Back To Top

Records: Reports

 Reports

pages


Reports provide the tutor with a detailed log of student activity and progress on Units of Sound. They can be saved as a pdf for printing.

  • The tutor can choose what skills are included in the Report via Report Options:
    report options
  • It is possible to display more than one student report at a time by clicking on multiple students in the student name column.

The Report includes:

  • Pages per session graph:   NB If you click on multiple students then the graph will display the activity for all selected students. This can be useful for an overview of how much Units of Sound is being used in your classes.
  • Progress Overview table
  • Recent activity – showing the last 10 sessions
  • Reading:
    – Sounds secure on Placement
    – Sounds completed
  • Spelling:
    – Sound secure on Placement
    – Sounds completed
  • Memory: Memory Phrases
  • Dictation: Sentences

0 people did not find this helpful

Back To Top

Records: Reporting on Progress

Tutors can use the Overview, Records, Reports and Reading Fluency results to provide feedback on student progress to the school, parents and students.

  • Overview: summary of progress including visual bar chart, total number of pages completed in each skill, average scores.
  • Records: saved results of Check Spelling, Memory Phrases and Dictation exercises. Shows exact stage and page reached for each skill and number of Reading Checks completed.
  • Reports: detailed information on what was secure on Placement and feedback on all sounds, words, phrases and sentences that the student has covered. Also shows Reading Check covered.

  • Reading Fluency: uses Reading Check passages to measure reading fluency progress. Guide in the Library.

For guidance on reporting, watch the Reporting on Progress video.

NB There is more information on Measuring Reading Fluency in the Library.

0 people did not find this helpful

Back To Top

04 Navigation

Menu Bar

 menu bar


Icons

From left to right:

  • Home (logo): takes you back to the Welcome screen.
  • Settings: this is where you can change –  activity box background colour, size of activity box/text (via zoom slide), password. Colour and zoom settings will stick once you log out and back in again.
  • Screen Tutor: click to play the screen tutor for the activity on the screen.
  • Library: Tutor’s Materials storage.
  • Help: Access to Help for Tutors, Technicians.

0 people did not find this helpful

Back To Top

Welcome screen

Welcome screen


Click here for Screen Tutor

Access

This is the main landing page for Units of Sound where students access their program. As you mouse over the skills areas they ‘grow’ into the skills bars giving details of where the student is within the program.

  • Click on the Reading / Spelling / Memory / Dictation icons to access those programs as set for the student.
  • Click on the student records rosette for more detail on progress.
  • Note that when you log in as a tutor the Welcome screen has a ‘jump’ arrow that allows the tutor to get to any stage and page – this can be useful for demonstration purposes.
    jump


Content

  • There are 52 “pages” in Stage 1; 48 in Stage 2; 48 in Stage 3.
  • Within each skill area there are a number of different activities.

They are:

  • Reading: Word blocks, Check Words, Check Sounds, Sentences, Passages, Quiz Questions.
  • Spelling: Word Blocks, Check Words, Check Spelling.
  • Memory: Speed Reading, Memory Phrases.
  • Dictation: Sentences


Student Records

Student Records is where the student can see the full stage and their overall progress.
The Records are accessed via the rosette below each skills bar:

rosette

Reading Records

srecords r

  • Hovering over a gold star brings up the page, date and time taken
  • The pink star represents a completed Reading Check set
  • A gold star with a white outline represents a Reading Check that is due
  • A white star indicates the Reading Checks that are in the pipeline.


Spelling, Memory, Dictation Records

srecords s

  • Hovering over a gold star reveals the page, date, time taken and score.


0 people did not find this helpful

Back To Top

Program screen

stars

Stars

  • Stars show the number of tasks to be completed within the activity.
  • In Reading:

–          Gold star: task has been completed

–          Empty star:  task has not been accessed

  • In Spelling, Memory and Dictation:

–          Gold star: answer is correct

–          Grey star: answer is wrong

–          Empty star: task has not been accessed.


pencils3

Pencils

  • The pencils show the type of activity – Explore, Practice or Challenge.
  • Explore (one pencil): The student is being introduced to the activity and there is support information available.
  • Practice (two pencils): The student is carrying out an activity within a secure framework.
  • Challenge (three pencils): The student has to apply knowledge and has only one go at getting it right.


circles


Circles

  • Circles: number of activities on the page.
  • Filled in circles: how many activities you have completed so far.

0 people did not find this helpful

Back To Top

05 Reading

Introduction

Reading icon

Overview

  • Reading is where all new units of sound and words are introduced.
  • The focus is on developing automatic decoding skills in the students.
  • Audio / visual patterns are used to reinforce the common elements within sets of words.
  • Students are required to record their own reading to compare it to the program model.

Content

0 people did not find this helpful

Back To Top

Word Blocks

 blocks

Click here for Screen Tutor

Introduction

  • Students are usually able to read the words in the word blocks as they are set within a secure audio / visual framework, and we tell them the new unit of sound.
  • When the page opens an introductory message is played automatically giving the unit of sound on that screen.
  • The student repeats the sound aloud.
  • The message can be replayed by clicking on the Reading icon.

Explore

  •  The 1 pencil Explore stage is where the students make use of the support elements before reading the words.
  • Click on the unit of sound to hear it again and to see the pattern highlighted in the word block.
  • Words not conforming to the exact sound are not highlighted.
  • Words of more than one syllable appear with a question mark beside them in the Explore phase.
  • Click on a question mark to hear and see the word broken down into syllables.

Practice     mic

  • Click on the arrow to activate the block.
  • Recording is now active (demonstrated by the appearance of a microphone) – this is now the 2 pencil Practice stage.
  • The first word in the block is highlighted for 2 seconds.
  • The student reads the word aloud into the microphone while it is highlighted.
  • After 2 seconds the word is read by the program voice.
  • The activity box moves to the next word and the process is repeated until all the words in the block have been read.

Checking & Feedback

  • Click on the Playback icon to hear the student’s voice followed by the program voice for each word in turn.
  • Alternatively, click on the tick for individual word feedback.
  • Rerecord any word that was wrong by clicking on the activity box arrow.
  • Students should be actively engaged in this process, noticing their own mistakes and self-correcting.
  • The tutor can play back the students’ recordings from Records if needed.
  • This means the tutor does not need to test or sit near the student during sessions.
  • The last three pages of recordings are stored.

Completion

  • Click on the arrow at the bottom of the activity box to go onto the next set of Word Blocks.
  • When all the stars are filled in click for the next activity in the usual way.
  • When there is more than one unit of sound on the same page the introductory message will automatically play when the student clicks through to the next activity.
  • These routines are repeated on every Reading page and soon become familiar.

0 people did not find this helpful

Back To Top

Check Words

 check words

Click here for Screen Tutor


Overview

  • Check Words are words that have already been introduced into the program in Word Blocks and are being revisited.
  • There is no unit of sound – since the words are not linked by a common audio / visual pattern.
  • The decoding skills of the student are challenged because the words are out of sequence.
  • However, the student should read these words easily, because they are not new.
  • Check Words do not appear on every Reading page, see the UofS Sequence Map for details of where they are.

Explore

  • The students will still be able to access support with syllables via the question mark  – this is the 1 pencil phase.
  • They can click on this as often as needed, prior to recording.
  • In the UK, syllable support for Check Words is available in Stages 1 & 2 only.

Practice

  • This activity works in the same way as the Word Blocks.

Checking & Feedback

  • Recording and playback function in the same way as in the Word Blocks.

Completion

  • Check Words are completed in the same way as for the Word Blocks.

0 people did not find this helpful

Back To Top

Check Sounds

 check sounds

 Click here for Screen Tutor

Overview 

  • Check Sounds are Units of Sound that have already been introduced and are being revisited.
  • They provide an excellent source of decoding revision.
  • Check Sounds do not appear on every Reading page.
  • See the Units of Sound Sequence Map for details of where they appear.

Explore

  • Clicking the question mark gives a clue word for the sound.
  • Students should click on each question mark to hear the clue word then repeat the word and sound aloud (e.g. “drum, dr”) before starting the practice phase.

Practice

  • This activity works in a similar way to the Word Blocks and Check Words.
  • Click on the activity box to activate the recording and begin the exercise.
  • When a Check Sound is repeated, such as ch ch, two sounds are required.
  • Read each UofS out loud when it is highlighted and check against the program voice.

Checking & Feedback

  • Listen to the recording to check for accuracy by clicking on the Playback icon or on each individual sound.
  • Rerecord any errors and listen back again.
  • Tutors can access the last three of these recordings from Records.

Completion

  • Completion is the same as for Word Blocks and Check Words.

0 people did not find this helpful

Back To Top

Sentences

 sentences
Click here for Screen Tutor

Overview

  • The student practices decoding skills in context with natural sentences that don’t use contrived language.
  • The sentence structure is tightly controlled for readability and so students should be able to read them easily.
  • Only one sentence appears on the screen at a time.
  • The stars tell you how many sentences there are.
  • Sentences do not appear on every UofS page.
  • See the UofS Sequence Map for where to find them.

Practice

  • Click on the sentence to highlight it and read it aloud.
  • Click on the sentence again to play the sentence sound.
  • Student reads the sentence again: the first time for decoding, the second to develop fluency.
  • Click on the arrow to move to the next sentence.

Checking & Feedback

  • Students are working independently on sentences and should manage their own pace of working through them.
  • There is no recording on sentences.

Completion

  • When all the stars are filled click through to the next activity.


0 people did not find this helpful

Back To Top

Passages

passages 
Click here for Screen Tutor

Overview

  • Sentences practice specific vocabulary whereas passages can develop a story or theme.
  • Students will be able to read with confidence because they have used the words before and the sentence structure is tightly controlled.
  • One paragraph is displayed on the screen at a time.
  • In the early part of the program, and where there is dialogue, there is always more than one sentence displayed at a time.
  • Passages do not occur on every page of the program.
  • See the UofS Sequence Map for details of where they are.

Practice

  • Click on the first sentence, read it aloud and then click again to hear the sound.
  • Repeat for the second sentence and so on.
  • The student then reads the whole passage again aloud without clicking on each sentence/listening to the sound. This gives fluency practice and helps the student to maintain the continuity of the story.
  • You should see students develop their technique with passages as their decoding skills improve.

Completion

  • The stars tell you the number of paragraphs in the passages.
  • When one paragraph is completed, click on the arrow in the usual way for the next paragraph.
  • When all the stars are filled in the activity is completed.

0 people did not find this helpful

Back To Top

Quiz Questions

 quiz questions

 Click here for Screen Tutor

Overview

  • Quiz Questions are vocabulary and reasoning exercises designed to encourage the student to think about word meanings.
  • The activities appear throughout the three stages but mostly in Stage 1.
  • The answer is connected to the clue, but it is not necessarily a direct answer to a question.
  • The student only has one attempt at each answer because this is a high challenge activity (3 pencil stage).

Challenge

  • Click to hear the clue and choose a word for the answer.
  • There are 3 ways the answer can be inputted:
  1. Click and stick – click on the word then click in the activity box
  2. Click and drag – click on the word and drag it into the box
  3. Type the word into the activity box.

Marking & Feedback

  • Checking is done by clicking on the tick.
  • A correct answer produces a gold star, if it’s wrong the star will be grey and the correct answer will appear above the activity box.
  • Click on the arrow for the next set of words and click again to hear the next clue.

Completion

  • The activity is complete when all the stars are filled in.
  • The answers are not scored with a mark because this is not a systematic check for decoding skills.


0 people did not find this helpful

Back To Top

Reading Check

Overview

  • Reading Check is where the tutor monitors the student’s reading accuracy and fluency to ensure they are always working on the correct level of material. To do this the student reads a sample of the previous 4-6 pages aloud to the tutor, who can then continue or reset pages.
  • There are 12 Reading Check sets in each stage making 36 in all and so you will need to do this exercise about every 4 weeks, depending on the frequency of the student’s work. The exercise takes about 10 minutes, or there is a shortened version if you are short of time or if you already have enough information.
  • All the detailed guidance on how to carry out the Reading Check, score and reset pages, are set out in the Screen Tutor videos. You should aim to do the Reading Check within a week of the alerts.

Access

  • The student is alerted that a Reading Check is due via the rosette at the end of a Reading page. The tutor is alerted when a Reading Check icon appears in the register next to the student’s name. You can then look in Reading Records to see which set is due.

RC icon
Monitoring Reading Screen Tutor


Passage

  • Reading Check starts with a passage that the student has not seen before. It operates in the usual way except that there is no sound.
  • The tutor clicks on each sentence in turn to highlight it and the student reads aloud, with the tutor listening for fluency and accuracy.
  • At the end of the passage, the tutor gives a score following the score guide below. If the passage is longer than one section, the tutor can change the scoring as they go from section to section.
  • We recommend the student then reads the whole passage again without you clicking on each sentence. This gives the student the opportunity to read with more fluency. You can decide to change your scoring on a second reading.

  • At this point, the tutor decides whether to end the Reading Check after the passage and click through to the register, or to continue on to the summary words and sounds for a more detailed picture. We recommend you do the full Reading Check, but if the passage was read fluently and accurately and you are short of time, this would be a situation where you could choose to only do the passage.
    Passage Screen Tutor


Word Blocks

  • Word blocks from the previous 4-6 pages are sampled for the student to read.
  • The student reads through the Word Blocks, recording if they want to. This can be useful for the tutor to hear back, but there is no program sound.
  • The score boxes appear with each Word Block set.
  • The tutor scores each block for fluency and accuracy following this score guide:

Word Blocks Screen Tutor


Check Words

  • The student reads through the Check Words, recording if they want to.
  • The score boxes only appear at the end of all the sets and so there is only one score for the whole activity.
  • The tutor scores the activity following this score guide:

Check Words Screen Tutor


Check Sounds

  • The student reads through the Check Sounds, recording if they want to.
  • The score boxes will only appear at the end of all the sets and so there is only one score for the whole activity.
  • The tutor scores the activity following this score guide:

Check Sounds Screen Tutor


Results                         reset

  • The final screen of Reading Check shows the Results, and any pages from the Word Blocks (in grey) that need redoing.
  • Scores for the Passage, Check Words and Check Sounds provide background information for the tutor to bear in mind when deciding on actions.


Action    action

  • The Action section shows the recommended pages to be reset based on any pages marked grey.
  • The tutor can manually set/unset pages based on the experience of the exercise and knowledge of the student.
  • A student completing a Reading Check comfortably will continue onto the next page in the program automatically.
  • Pages showing reset will automatically be set again for the student.
  • If pages are reset this would be a good time to use the Good Practice Checklist to ensure the student is following the processes accurately.
  • A tutor could also consider switching overlap on to give extra practice and slowing down the pace that the student works through the material.
  • In more exceptional cases where the student is making many errors and cannot read fluently, then consider re-doing Placement to check that the level has been set correctly.
  • Students should always be working at a comfortable level, not where they are struggling.
    Results Screen Tutor

0 people did not find this helpful

Back To Top

Good Practice Checklist

Introduction

  • The Good Practice Checklists set out the steps the student should be taking in order to use Units of Sound effectively.
  • The Good Practice Checklist for Reading is copied here.
  • See the Good Practice Checklists  in the Library section for more details on their use.

Word Blocks

Make sure your student:

  • Has headphones on before opening the reading program
  • Repeats the unit of sound aloud after introduction
  • Clicks on the unit of sound and repeats the sound aloud
  • Clicks on question mark to hear syllables
  • Activates  the reading block sequence and records own reading of the words
  • Listens to the recording
  • Repeats recording if necessary, to correct errors
  • Activates all blocks of words
  • Moves on only when all stars are filled in.

Check Words

Make sure your student:

  • Clicks on question mark to hear syllables
  • Activates  the reading sequence and records own reading of the words
  • Listens to the recording
  • Repeats recording if necessary, to correct errors
  • Activates all sets of words
  • Moves on only when all stars are filled in.


Check Sounds

Make sure your student:

  • Clicks on question mark to activate clue word if needed
  • Activates  the check words sequence and records own reading
  • Listens to the recording
  • Repeats recording if necessary, to correct errors
  • Activates all sets of check sounds
  • Moves on only when all stars are filled in.


Sentences & Passages

Make sure your student:

  • Clicks on each sentence to highlight it in turn
  • Reads the sentence aloud until fluent
  • Clicks on the sentence again to hear it read
  • Re-reads sentence aloud to improve  if necessary
  • Activates all sets of sentences / passages
  • Moves on only when all stars are filled in.


Quiz Questions

Make sure your student:

  • Clicks on the arrow to hear the question
  • Repeats click to hear the question again if necessary
  • Clicks and drags answer OR clicks and sticks answer OR types answer in box
  • Clicks on tick to check
  • Moves on only when all stars are filled in.


0 people did not find this helpful

Back To Top

06 Spelling

Introduction

Overview

  • We use the audio / visual patterns as the basis of the spelling program.
  • We do not focus on spelling rules which makes this program accessible to students with a wide variety of abilities.
  • The Spelling program consists of: Word Blocks, Check Words and Check Spelling.
  • Word Blocks and Check Words have already been introduced in Reading.
  • They are practice activities, where the student may make mistakes and correct them.
  • Each Check Spelling exercise revisits one word from each of the previous ten pages.Click here for Screen Tutor:
    Spelling Blocks, Check Words, Check Spelling

0 people did not find this helpful

Back To Top

Word Blocks

spblock1spblock2

Click here for Screen Tutor

Explore

  • This is where the new words for spelling are introduced.
  • As this is the first spelling activity, there are tools in place to support the student.
  • The words are displayed on the screen initially.
  • Click on the Unit of Sound to reveal the audio / visual pattern in the words – this is the one pencil explore stage.
  • The student should scan the words to notice any unusual spellings or word patterns and note any punctuation.
  • It is recommended the student reads the words aloud.
  • Click on the arrow (as in Reading) to start the activity – this moves the student into a 2 pencil practice phase.

Practice

  • The words disappear once you start the activity.
  • Click on the arrow in the activity box to hear the word for spelling.
  • Repeat the word aloud.
  • Type the word, saying the letter names (not the letter sounds) aloud.
  • This helps memory and supports the multisensory loop.
  • The words can be heard as many times as needed.

Marking & Feedback

marking

  • Click on the tick to mark the word.
  • If the tick turns gold then the word is correct.
  • If it doesn’t, the word is spelled incorrectly and the student needs to have another go.
  • The student has three attempts at spelling the word correctly.
  • If the word is still wrong after three goes, the word is locked and the correct spelling is shown in Hints & Tips.

Homophones

  • Homophones are words that sound the same but have different spellings, e.g. their/there.
  • They occur mostly in Check Words and Check Spelling because the words there are not conforming to a set pattern.
  • If the target word is a homophone and the alternative spelling is used on the third attempt, the tick turns pink and the student has another go at spelling the word correctly.
  • If a student types main in a block where the unit of sound is a-e for instance, then it will be marked wrong because it does not conform to the pattern on that page.

Completion

  • Stars show how many blocks of words there are on the page.
  • Click for the next block of words.
  • When all the stars are filled in you have finished the activity.
  • Click on the arrow on the right hand side to move onto the next activity in the usual way.
  • If there is more than one UofS on a page, the new UofS and word blocks will be shown next.

0 people did not find this helpful

Back To Top

Check Words

spelling check words
 Click for Screen Tutor

Overview

  • Check Words are words that have already been introduced in the program and are being revisited.
  • They are still in the 2 pencil practice stage.
  • Although check words operate in a similar way to the word blocks, the words are not on view first.
  • There is no common unit of sound to provide a pattern.

Practice

  • Click on the arrow in the activity box to hear each word.
  • Repeat the word aloud.
  • Type the word, saying the letter names aloud.
  • Listen to the word as many times as needed.

Marking & Feedback

  • Click on the tick to  see if the word is spelled correctly.
  • If the tick turns gold the word is correct and you can move on to the next word.
  • If it doesn’t, the word is spelled incorrectly and the student needs to have another go.
  • The student has three attempts at spelling the word correctly.
  •  If the word is still wrong after 3 goes, the word is locked and the correct spelling is shown in Hints & Tips.

Homophones

  • Homophones are words that sound the same but have different spellings, e.g. their/there.
  • They occur mostly in Check Words and Check Spelling because the words there are not conforming to a set pattern.
  • If the target word is a homophone  and the alternative spelling is used on the third attempt, the tick turns pink and the student has another go at spelling the word correctly.
  • If a student types main in a block where the unit of sound is a-e for instance, then it will be marked wrong because it does not conform to the pattern on that page.

Completion

  • Stars show how many set of check words there are on the page.
  • Click for the next set of words.
  • When all the stars are filled in you have finished the activity.
  • Click on the arrow on the right hand side to move onto the next activity in the usual way.

0 people did not find this helpful

Back To Top

Check Spelling

 check spelling
Click for Screen Tutor

Overview

  • Check Spelling consists of 10 revision words – one word from each of the previous 10 pages and so there is no common unit of sound pattern.
  • Check Spelling regulates the student’s rate of progress through the Spelling program.
  • The student needs to get 8 out of 10 words correct to move on.
  • Check Spelling is a 3 pencil activity and provides revision on the Spelling program to check if knowledge is secure.

Challenge

  • This activity starts at Stage 1 Page 6.
  • As with the Check Words the student does not see the words first.
  • Click the activity box to hear the sound as many times as needed.
  • This time, the student only has one attempt at getting the word right.

Marking & Feedback

results spelling      results print out

  • As the student progresses through the 10 words the stars turns gold when the word is correct and grey when wrong.
  • A minimum score of 8/10 is needed to progress to the next page.
  • If the student gets a score lower than 8/10, the page is set again automatically – so the tutor does not need to change anything on the program and can allow the student to continue to work independently.
  • On the results page, any incorrect words have the correct spelling shown above them.
  • The student can print this page as a record and to take note of errors.


0 people did not find this helpful

Back To Top

Good Practice Checklist

Introduction

  • The Good Practice Checklists set out the steps the student should be taking in order to use Units of Sound effectively.
  • The Good Practice Checklist for Spelling is copied here.
  • See the Good Practice Checklists  in the Library section for more details on their use.

Word Blocks

Make sure your student:

  • Has headphones on and volume is up
  • Clicks on UofS to hear sound and see the pattern in the word block
  • Views word blocks, actively looking for patterns
  • Clicks on arrow to activate spelling and clear words
  • Clicks on arrow to hear word
  • Types word in box , saying names of letters aloud while typing
  • Clicks on tick to check
  • If correct, moves on to next word
  • If wrong, uses two further attempts
  • If still wrong, views correct spelling in Hints & Tips area
  • Moves on only when all stars are filled in.


Check words

Make sure your student:

  • Clicks on arrow to activate spelling
  • Clicks on arrow to hear word
  • Types word in box , saying names of letters aloud while typing
  • Clicks on tick to check
  • If correct, moves on to next word
  • If wrong, uses two further attempts
  • If still wrong, views correct spelling in Hints & Tips area
  • Moves on only when all stars are filled in.

Check Spelling

Make sure your student:

  • Clicks on arrow  to activate
  • Types answer in box, saying letters aloud while typing
  • Clicks on tick to check
  • Clicks for next word
  • Moves on only when all stars are filled in.


0 people did not find this helpful

Back To Top

07 Memory

Introduction


Overview

  • Memory consists of two different activities: Speed Reading and Memory Phrases.
  • Memory is set automatically from Spelling Placement.
  • The starting point for Memory is set 10 pages behind Spelling.
  • This is where the student moves from single words to phrases.
  • There are 10 phrases in each Memory activity.
  • Each set of phrases comes from a single page of UofS plus some high frequency sight words.
  • The student has already covered the UofS patterns 3-4 times in Reading and 3 times in Spelling, and so Memory adds another layer of repetition and revisiting.
    This Screen Tutor shows how Memory, Dictation and Writing Activities work together. It is helpful for understanding the ‘big picture’.

0 people did not find this helpful

Back To Top

Speed Reading

 memory phrase

Practice

  • Speed Reading is a preparatory exercise where the student has 2 seconds to read each phrase.
  • This activity challenges the student to decode at speed.
  • Click on the arrow in the activity box to start, and then read the phrases out loud.
  • The stars fill up as each phrase appears.
  • This is a 2 pencil practice activity.

0 people did not find this helpful

Back To Top

Memory Phrases

 memory phrasememory 10 sec

 Click for Screen Tutor

Introduction

  • This is a 3 pencil challenge activity.
  • There is no sound used in this activity, concentrating instead on visual memory and spelling knowledge.
  • Students develop memory strategies working through this activity and come to understand how saying things aloud helps memory.

Challenge

  • Click on the arrow in the activity box to see the first phrase.
  • The phrase will stay on the screen for 5 seconds.
  • Read the phrase aloud, several times.
  • The phrase disappears and the keyboard is locked for 10 seconds.
  • Saying the phrase out loud during the pause will aid memory.
  • The activity box bar empties as the seconds are counted down.
  • When the cursor appears again, type in the phrase.

Marking & Feedback

memory marking

  • The phrase is marked in the usual way by clicking on the tick.
  • Once a phrase has been marked, it can’t be changed.
  • If it’s correct, the star turns gold.
  • If there are errors, the star turns grey and the correct phrase appears above the activity box.
  • The student needs to get 8 out of 10 for the page to move on.
  • A complete record of the 10 phrases can be printed by the student from the records screen.


0 people did not find this helpful

Back To Top

Good Practice Checklist

Introduction

  • The Good Practice Checklists set out the steps the student should be taking in order to use Units of Sound effectively.
  • The Good Practice Checklist for Memory is copied here.
  • See the Good Practice Checklists  in the Library section for more details on their use.


Speed Reading

Make sure your student:

  • Reads the phrases aloud as they appear


Memory Phrases

Make sure your student:

  • Repeats each phrase aloud during 5 seconds on screen
  • Actively looks at spelling and punctuation
  • Continues to repeat phrase aloud during 10 seconds when screen is locked
  • Types phrase when box is unlocked
  • Checks phrase and spelling before clicking on tick to check
  • Moves on only when all stars are filled in.

0 people did not find this helpful

Back To Top

08 Dictation

Introduction

 Click for Screen Tutor

Overview

  • Dictation is where the student moves to writing and spelling whole sentences.
  • Each activity consists of 5 sentences for the student to hear, type and spell.
  • Dictation is set automatically from Spelling Placement.
  • The starting point for Dictation is 15 pages behind Spelling and uses words taken from previous pages.
  • Spelling should not be a problem as these words have been revisited several times already.
  • Dictation makes the student think about spelling, word sequence and punctuation at a whole sentence level.
  • Dictation is also used for the Writing Activities as a basis for developing writing skills.

0 people did not find this helpful

Back To Top

Sentences

 dictation

Challenge

  • Dictation is a 3 pencil activity using words the student has revisited several times and there is no correction facility after marking.
  • Dictation will be locked until the student reaches Stage 1 Page 16 in Spelling.
  • Click on the arrow to hear the sentence as many times as needed.
  • Repeat the sentence aloud.
  • Type in the sentence: paying attention to word sequence, spelling and punctuation.
  • Help with punctuation is given in the Hints & Tips area for word count, commas, question and exclamation marks.
    hints
  • Before marking, the student should listen to the audio again and check every component.
  • By learning to check carefully at the single sentence level, students are building up a useful skill for longer pieces of writing later.

Marking & Feedback

  • Click on the tick to mark the sentence.
  • If it’s correct, the star turns gold.
  • If there are errors, the star turns grey and the correct sentence appears above the activity box.
    dictation marking
  • The sentence cannot be changed once it is marked as this would reduce the exercises to a word by word task rather than a whole sentence.
  • The student needs to score at least 4 sentences completely correct to move on to the next lesson.
  • The sentences can be printed from Results for the student to compare answers with the model and make note of errors.
  • This is an exacting activity and students often take a few pages to settle into the routines.

0 people did not find this helpful

Back To Top

Good Practice Checklist

Introduction

  • The Good Practice Checklists set out the steps the student should be taking in order to use Units of Sound effectively.
  • The Good Practice Checklist for Dictation is copied here.
  • See the Good Practice Checklists  in the Library section for more details on their use.

Dictation

Make sure your student:

  • Has headphones on and volume is up
  • Clicks on arrow to activate sentence and to listen
  • Repeats the sentence aloud
  • Listens to sentence again as needed
  • Uses punctuation guide in Hints & Tips
  • Types in sentence
  • Before getting the sentence marked, clicks to hear the sound again and checks the sentence thoroughly
  • Clicks on tick to mark
  • Moves on only when all stars are filled in.

0 people did not find this helpful

Back To Top

09 Writing Activities

Overview

Introduction

  • Writing Activities develop the student’s writing skills, vocabulary and fluency.
  • They use the Units of Sound Dictation sentences as a starting point for creative writing.
  • Stage 1 concentrates on sentence writing, and Stages 2 and 3 on paragraph writing.
  • The student can start as soon as the first Dictation set has been completed.
  • Decide whether the  student uses a computer or paper for the Writing Activities, according to the student’s needs and the teaching environment.
  • The Writing Materials are structured to gradually develop writing skills over the three stages of Units of Sound. Students who do not start in Stage 1 should still follow the writing activities from that stage initially, but applied to sentences at a higher level.
  • Detailed instructions on how to use the activities are available as a pdf, which can be found in the Library.
    Click here for Screen Tutor - this is useful to show how Memory, Dictation and the Writing Activities work together.

0 people did not find this helpful

Back To Top

Stage 1

Activities: Stage 1

  • Student makes all five Dictation sentences longer by adding words.
  • Another sentence is then added to extend the story.
  • These two activities are then combined as the student works through Stage 1.
  • By the end of the stage, the student adds words to each Dictation sentence and extends the story by two further sentences.

0 people did not find this helpful

Back To Top

Stage 2

Activities: Stage 2

  • Paragraph writing is split into manageable chunks.
  • The concept of CODE is used to help organize thoughts, plan work, draft and then proof read.
  • C = create, O = organize, D = draft and E = edit.
  • One sentence from the Dictation set is chosen, and the student writes a paragraph using CODE.
  • Create and Organize are completed in the first session, Draft in the second, and Edit in the third.
  • By the end of the stage, the student tries to use a minimum of ten words per sentence, and times how long each step takes.

0 people did not find this helpful

Back To Top

Stage 3

Activities: Stage 3

  • In Stage 3 the student is encouraged to use a mix of short and longer sentences and to use past tenses to develop a formal style.
  • Half way through Stage 3, the student tries writing a paragraph using CODE in just one session.
  • Give a time limit of five minutes for creating and organizing, ten minutes for drafting and five minutes for proofreading.

0 people did not find this helpful

Back To Top

10 Library Resources

Introduction

Overview

  • The Library icon can be found on the top menu bar when you are logged on as a tutor.
  • This is a resource for tutors, and so students do not have access to it.
  • This is where you can find all the support materials to use in a Units of Sound lesson.
  • Documents are in pdf format so that you can print however many you need, as you need them.
  • Over time, we expect to be adding to the resources stored here, so have another look in it from time to time.

0 people did not find this helpful

Back To Top

Books

Units of Sound Books

The Units of Sound Books contain the content of the Reading programme, excluding the Quiz Questions. They provide a useful overview of the programme and can be used for more detailed 1:1 work with a student if needed.
The Book page numbers match the page numbers in the online programme.

Content

  • Units of Sound and Word Blocks
  • Check Words
  • Check Sounds
  • Sentences & Passages
  • Reading Check – ‘A’ pages


What are the Books for?

  • For a more detailed check on a specific page covering sounds the student had difficulty with in the Reading Check.
  • For 1:1 revision purposes in relation to a student’s needs.
  • For an overview of the content to see how the structure builds.

Units of Sound Book Stage 1
Units of Sound Book Stage 2
Units of Sound Book Stage 3

0 people did not find this helpful

Back To Top

Good Practice Checklists

Overview

  • The Good Practice Checklists set out the steps the student should be taking in order to use Units of Sound effectively.
  • There are four checklists, one each for Reading, Spelling, Memory, Dictation.
  • You should expect to use them more than once with each student, so you may find it useful to print a set for each student and keep it in the student’s file.

    Click here for Screen Tutor

Practice

  • The tutor uses the checklists to make sure the student is working on the activities correctly – it is then that the tutor can leave the student to work independently.
  • If students are following Good Practice they should make good rates of progress with Units of Sound.
  • Use the Checklists as a diagnostic tool to pinpoint why a student is not progressing as well as expected .
  • Go back to the Checklists to see if all the steps are being followed.
  • The cumulative effect of several omissions of steps from the Checklists can make a difference to progress rates.
  • For students with more severe literacy difficulties, the Checklists can make the difference between success and failure.
  • They are also useful for parents who are working independently with their own child or in conjunction with a school.
  • After using a checklist whilst observing a student, talk to the student about any un-ticked items.
  • The student should have a better understanding why certain actions contribute to active learning.
  • The tutor should feel confident that the student is engaged with Units of Sound and the processes involved in using it.

Click to download Good Practice Checklist

0 people did not find this helpful

Back To Top

Writing Activities

Resources

  • An explanation can be found in Help section 09 Writing Activities.
  • The complete set of Writing Activities is stored in the Library as a pdf.
  • Print as many copies as you need for use with your students.

Click here to download the Writing Activities document

0 people did not find this helpful

Back To Top

Screen Tutors

screen tutor

  • There is an audio / visual Screen Tutor on every Units of Sound screen giving clear instructions on how to work through the activity on that screen.
  • Screen tutors are intended to be used by both students and tutors as needed.
  • Individually they can accessed from the icon on the menu bar, but can also be found in here in Help under the subject headings.

0 people did not find this helpful

Back To Top

Certificates

 certificates

Stage Completion Certificates for Students

  • There are pdf student certificates for completing stages 1, 2 and 3 of the skills areas, Reading, Spelling, Memory and Dictation.
  • They can be printed and given to students marking progress.
  • There is a powerpoint (ppt) version for tutors working remotely with a student, so that name/date can be typed before sending.


Reading Certificates (all Stages)

Reading pdf     
Reading ppt


Spelling Certificates

Spelling pdf       
Spelling ppt


Memory Certificates

Memory pdf
Memory ppt


Dictation Certificates

Dictation pdf 
Dictation ppt

0 people did not find this helpful

Back To Top

Options Explored

The Options Explored document helps tutors new to Units of Sound make the best use of Options for their students. It includes information on logins, Placement, Overlap and AutoRoute.

Click here for the Options Explored document


0 people did not find this helpful

Back To Top

Units of Sound Sequence Maps

The UofS sequence map is an overview of the Reading program content for each stage. It is useful if the tutor wants to see at a glance which Units of Sound have been covered and which activities each page includes.

The map shows:

  • page number and Units of Sound
  • pages that have Check Words
  • pages that have Check Sounds
  • pages that have Sentences
  • pages that have Passages
  • pages that have Quiz Questions
  • when the Reading Check sets occur.


Click here for the UK Sequence Map


0 people did not find this helpful

Back To Top

Managing the Learning Environment

Managing the Learning Environment checklist talks you through all the things you need to consider to set up your Units of Sound classroom.

Managing the Learning Environment

0 people did not find this helpful

Back To Top

Overview Guide

The Overview is an ‘at a glance’ view of a student’s work completed so far in all four skills areas. It is accessed from the Register by clicking on the student name and then Overview in the menu tab.

The following document is a guide to the Overview, which can be useful for parents/guardians of students:
Overview Guide

0 people did not find this helpful

Back To Top

Measuring Reading Fluency

The Measuring Reading Fluency materials use the Units of Sound Reading Check set passages to measure reading fluency progress.

A Reading Fluency check should be carried out at least as frequently as a Reading Check and fits nicely between Reading Checks.
Always use the Reading Fluency set that is at least one behind the latest Reading Check completed. So for example, if the last Reading Check was stage 1 set 6, the tutor would do Reading Fluency set 5.

See the Tutor’s Guide for detailed instructions and the Measuring Reading Fluency video for an overview.

Reading Fluency Materials:

Tutor’s Guide 
Measuring Reading Fluency Overview Video


Tutor sheets:

Student sheets:

0 people did not find this helpful

Back To Top

Units of Sound PLUS

Introduction

Units of Sound PLUS videos are an easy to use series of seven ‘drill’ videos that will enhance your Units of Sound sessions and broaden the range of students who can benefit from the program. They add further support for students who are working at the beginning of Stage One, or for those not quite ready for cvc reading. The videos provide the ‘drills’ to bridge the gap between insecure letter-sound correspondence and cvc reading.
Everything you need to know about how to use the Units of Sound PLUS videos is in the document and video guides below.

Materials Overview

Picture, Sound, Letter (PSL) videos: A series of four videos taking the student from naming alphabet pictures to giving the sound at the beginning of the picture and linking it with the name of the letter – thus learning all the alphabet names and sounds.

Word endings (WE) videos: A series of three videos allowing the student to develop skills in reading common two letter word endings before moving on to the more usual cvc words. The word endings are given in vowel order, consonant order and shuffled to further develop automaticity.

Units of Sound PLUS Guide
PSL Video Guide
WE Video Guide

PLUS Videos:
1 PSL picture
2 PSL picture – sound
3 PSL p
icture – sound – letter
4 PSL shuffled
5 WE vowel order
6 WE consonant order
7 WE shuffled

0 people did not find this helpful

Back To Top

11 Getting Started at Home

Working at Home

A good way for a student to progress more quickly through Units of Sound is to work on the programme at home as well as in school. As an example, if there is not enough time during school hours you may want them to do one extra session per week. You may also have students who wish to continue during school holidays.

This may not be appropriate for all students, so use the following as a guide to help decide which students would benefit from doing some extra work at home:

  • The student has access to a computer/laptop, internet and a headset and mic at home
  • You have seen that the student works through the activities in the correct way
  • The student is happy and confident working independently
  • The student would benefit from an extra session a week
  • The student wishes to continue during school holidays

0 people did not find this helpful

Back To Top

Letters to send home

We have created an introductory letter that can be sent to the parent or guardian to help explain Units of Sound. You may wish to send the letter even if the student is only using it at school/ in a private tutored lesson:

Letter to parent or guardian

The Guide below is to send home with the student to provide login details and information for the parent or guardian on how to get started.
Please download and print this document and enter the following information:
1. Student’s login
2. Time to be spent on Units of Sound per week

Guide to getting started at home

If a parent needs help with the sound/mic, you can send them this video to help:

Sound Check

0 people did not find this helpful

Back To Top

12 Remote Support

Remote Support

The design of Units of Sound makes it an ideal intervention program for supporting students remotely.

You may be a tutor looking to do Placement and all your Units of Sound lessons remotely, or wishing to check in with a student from time to time to carry out Reading Check.

The document below guides on:

  • Technology: screen sharing and audio
  • How to carry out Placement
  • How to get the student started on Reading, Spelling, Memory, Dictation skills
  • How to carry out a Reading Check

Remote Support for Units of Sound

0 people did not find this helpful

Back To Top